Table of Contents
- Initial Considerations
- Product Page Setup.
- Non Product Page Setup.
- Installation Process (Product Page & Non Product Page)
- Troubleshooting
Initial Considerations
- An active Gallery Plan is required to use this feature.
- You must have generated and obtained the necessary script and button implementation codes from the Widgets’ section. Learn how to properly do that, here.
- ArtPlacer’s Shopify App must be installed.
- If you’re planning to implement Widgets on a Product Page (Shop page), the products (hence the Artworks) must be previously listed on your Shopify inventory as physical products with specified height and width dimensions. Learn how to properly do this, here.
- For Product Pages, make sure that the Artworks (hence the products) on your Shopify store have been listed as ‘physical products’ because the widget will attempt to read the dimensions set at Shopify dashboard → Product → (Product to be displayed) → Variants
- For non-Product/Shop pages, the Artworks need to be previously uploaded to your ArtPlacer Dashboard Artworks’ section. Learn more about that, here.
- Confirmed list of fully supported themes (July 2024): “Dawn”, “Prestige V5 (3.0)”, “Debut”, “Crave”, “Minimal”, “Galleria”, “Flex”, “Studio”, “North”, “California”, and “Impulse”.
NOTE: don’t hesitate to install our app if your active store theme is not mentioned on the list from above. As long as the theme was acquired from Shopify’s official store, you should still be able to install our app and widgets, easily.
⚠️ 3rd party/custom (non-official) Shopify theme users: we cannot guarantee compatibility.
Product Page Setup.
Set Up Artwork Dimensions.
Before installing the widget on a Product Page, you must configure product variants that define the artwork dimensions. The widget reads the artwork size directly from these variants.
Make sure that your Artworks (i.e., your product listings) are set as physical products in Shopify. The widget will pull the dimensions from:
Shopify Dashboard → Products → (Select Product) → Variants

Compatible Formats (Required for Size Variants)
To ensure the Widget correctly reads artwork dimensions from your product variants, the variant Option Name and Option Values must follow compatible formats.
- Accepted Option Names:
“Size”, “Sizes”, “Sizing”, “Dimension”, “Dimensions”, “Measurements”, or “Measures”.
(If your site is offered in multiple languages, please reach out to us for further guidance.) - Accepted Option Value Formats:
“WxH in (or CM)”, “HxW in (or CM)”, “WxH in (or CM) - text”, or “HxW in (or CM) - text” (where W = width and H = height).
Size variants should look similar to this from the visitor's POV (numeric values upfront).
⚠️Note: The size variants may be displayed to visitors as individual buttons or within a dropdown selector, both formats are fully supported as long as the formats above are followed.

Non Product Page Setup.
For non-Product/Shop pages, the Artworks need to be previously uploaded to your ArtPlacer Dashboard Artworks’ section.
Learn more about that, here.
If you want to showcase more than one Artwork on your non-product page but don’t want to display your entire catalog, you can create Artwork Collections within your Artworks section. This allows you to curate and manage which specific Artworks will appear on your widget.
Learn how to create an Artwork Collection here.
Installation Process (Product Page & Non Product Page)
- From slide 1–4 Product Page.
- From slide 5–7 Non Product Page.
Troubleshooting
General Troubleshooting
Problem: the Widget buttons are not visible
- Check the following:
Log into your Shopify store Dashboard → Apps → ArtPlacer and verify the products collections that have been excluded (marked=excluded):


- Problem: The Widget button is loading in the wrong position.
Check the following:- If you need to check on this, go to the Widget Button settings at Shopify dashboard → Apps → ArtPlacer → Widget → Button code:

Try the different positions by simply replacing the value “floating” for “below-description” (below product description), “above-description” (above) or, “below-add” (below ‘Add to cart’ button).
- If you need to check on this, go to the Widget Button settings at Shopify dashboard → Apps → ArtPlacer → Widget → Button code:
Troubleshooting for Product Pages
Problem: The Widget is displaying the wrong Artwork dimensions (when installed on a product page).
Check the following:
- If you encounter this issue, please first ensure that you’ve completed the steps outlined above in the “Set Up Product Variants (Required Before Integration)” section.
- Check if the unit of measurement and dimension standard set in the widget code matches with the ones set in your products. Go to the Widget Button settings at Shopify dashboard → Apps → ArtPlacer → Widget → Button code:

Change the values between (highlighted) captions as needed (“wxh” for “hxw” and/or “in” for “cm”).
- Problem: The Widget is showing the wrong Artwork image.
Check the following:
- Go to the Widget Button settings at Shopify dashboard → Apps → ArtPlacer → Widget → Button code.
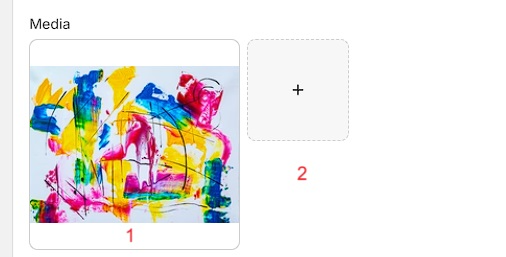
Verify which image is set to be showcased from the product Media files:

Change the number value between captions (highlighted) accordingly to the image you want to be showcased.
NOTE: if you want the image connected to the Variant to showcased instead, simply delete the line ‘product_sample_image=”1”’ from the Button Code field

Troubleshooting for Non Product Pages:
- Problem: The Widget is displaying the wrong Artwork dimensions (when installed on a non-product page)
Check the following:
- Head up to the Artworks’ section within your ArtPlacer account and verify the Artwork dimensions.
- Problem: I want to display more than one Artwork, but not my entire catalog.
Check the following:
- Create Artwork Collections in your Artworks section. This allows you to group and display only the specific Artworks you want on your widget, giving you full control over what appears.
Learn how to create an Artwork collection here.
