Table of Contents
- 1. Choose a Room
- 2. Add and Position Your Artwork
- 3. Move and Edit Multiple Artworks at Once
- 4. Frame Your Artwork
- 5. Use the Bottom Controls to Customize Your Mockup
- 6. Try Your Artwork in Other Rooms
- 7. Crop Your Design
- 8. Save, Download, or Share
1. Choose a Room
- Open the Sidebar and select ROOM MOCKUPS.
- Browse the rooms, or use the search bar and FILTERS to find the right one. You can filter by space, style, orientation, wall size, Smart Spaces, and Perspective.
- Click the room where you’d like to place your Artwork.
Good to know:
- Rooms with the green SMART label let you place your Artwork behind objects, like furniture or plants, and change the wall color.
- Rooms come in three sizes, defined by wall height. Small: up to 60 cm (1.2 ft). Medium: 61 to 100 cm (1.3 to 3.3 ft). Large: 101 to 200 cm (3.4 to 6.6 ft).
- Perspective rooms (shown at an angle) can’t also be Smart Spaces.
- Hover over a room and click the heart icon to add it to "My Favorites".
2. Add and Position Your Artwork
- Click ARTWORKS at the bottom of your screen.
- Upload your Artwork file, or drag and drop one you’ve already uploaded onto the wall.
- Use the tools that appear to resize or rotate your Artwork until it fits just right.
⚠️ If you delete an Artwork from the Artworks section, it is also removed from any Room Mockups where it was being used.
When you select an Artwork, you’ll see two buttons next to it:
- Replace Artwork: the image icon, which lets you swap the image for a different Artwork.
- Three dots (⋮):opens a menu with more options:
- Duplicate Artwork: creates a copy of the Artwork.
- Lean Against Wall: tilts the Artwork slightly so it looks like it’s resting against the wall, perfect for showing pieces on a desk or the floor. Once your Artwork is leaning, this option changes to Hang on Wall.
- Remove Artwork: removes the Artwork from the room.
- Duplicate Artwork: creates a copy of the Artwork.
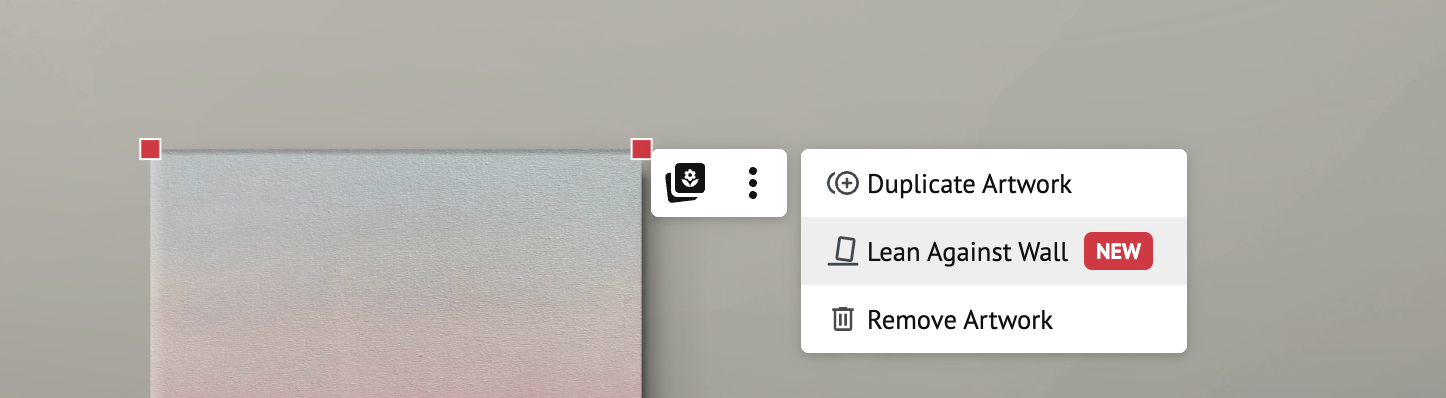
Note: Lean Against Wall isn’t available on walls in perspective, where it appears grayed out.
Want to learn more? Read How To Make an Artwork Lean Against the Wall in a Space
3. Move and Edit Multiple Artworks at Once
When you have several Artworks in a room, you can select them together and edit them in one go.
- Hold Ctrl (Windows), Command (Mac), or Shift on your keyboard and click each Artwork you want to select.
- Once selected, you’ll see on screen that they’re all grabbed. You don’t need to keep holding the key.
- Apply your changes. You can add frames, adjust lighting, edit shadows, or change position for all of them at once.
4. Frame Your Artwork
- Once you place an Artwork in a room, the FRAMES button at the bottom of the screen becomes available.

- Click FRAMES and browse with the slider or the search bar.
- Click the frame you want. It applies instantly. If you have several Artworks in the room, click the one you want to frame first.
Edit or create a frame
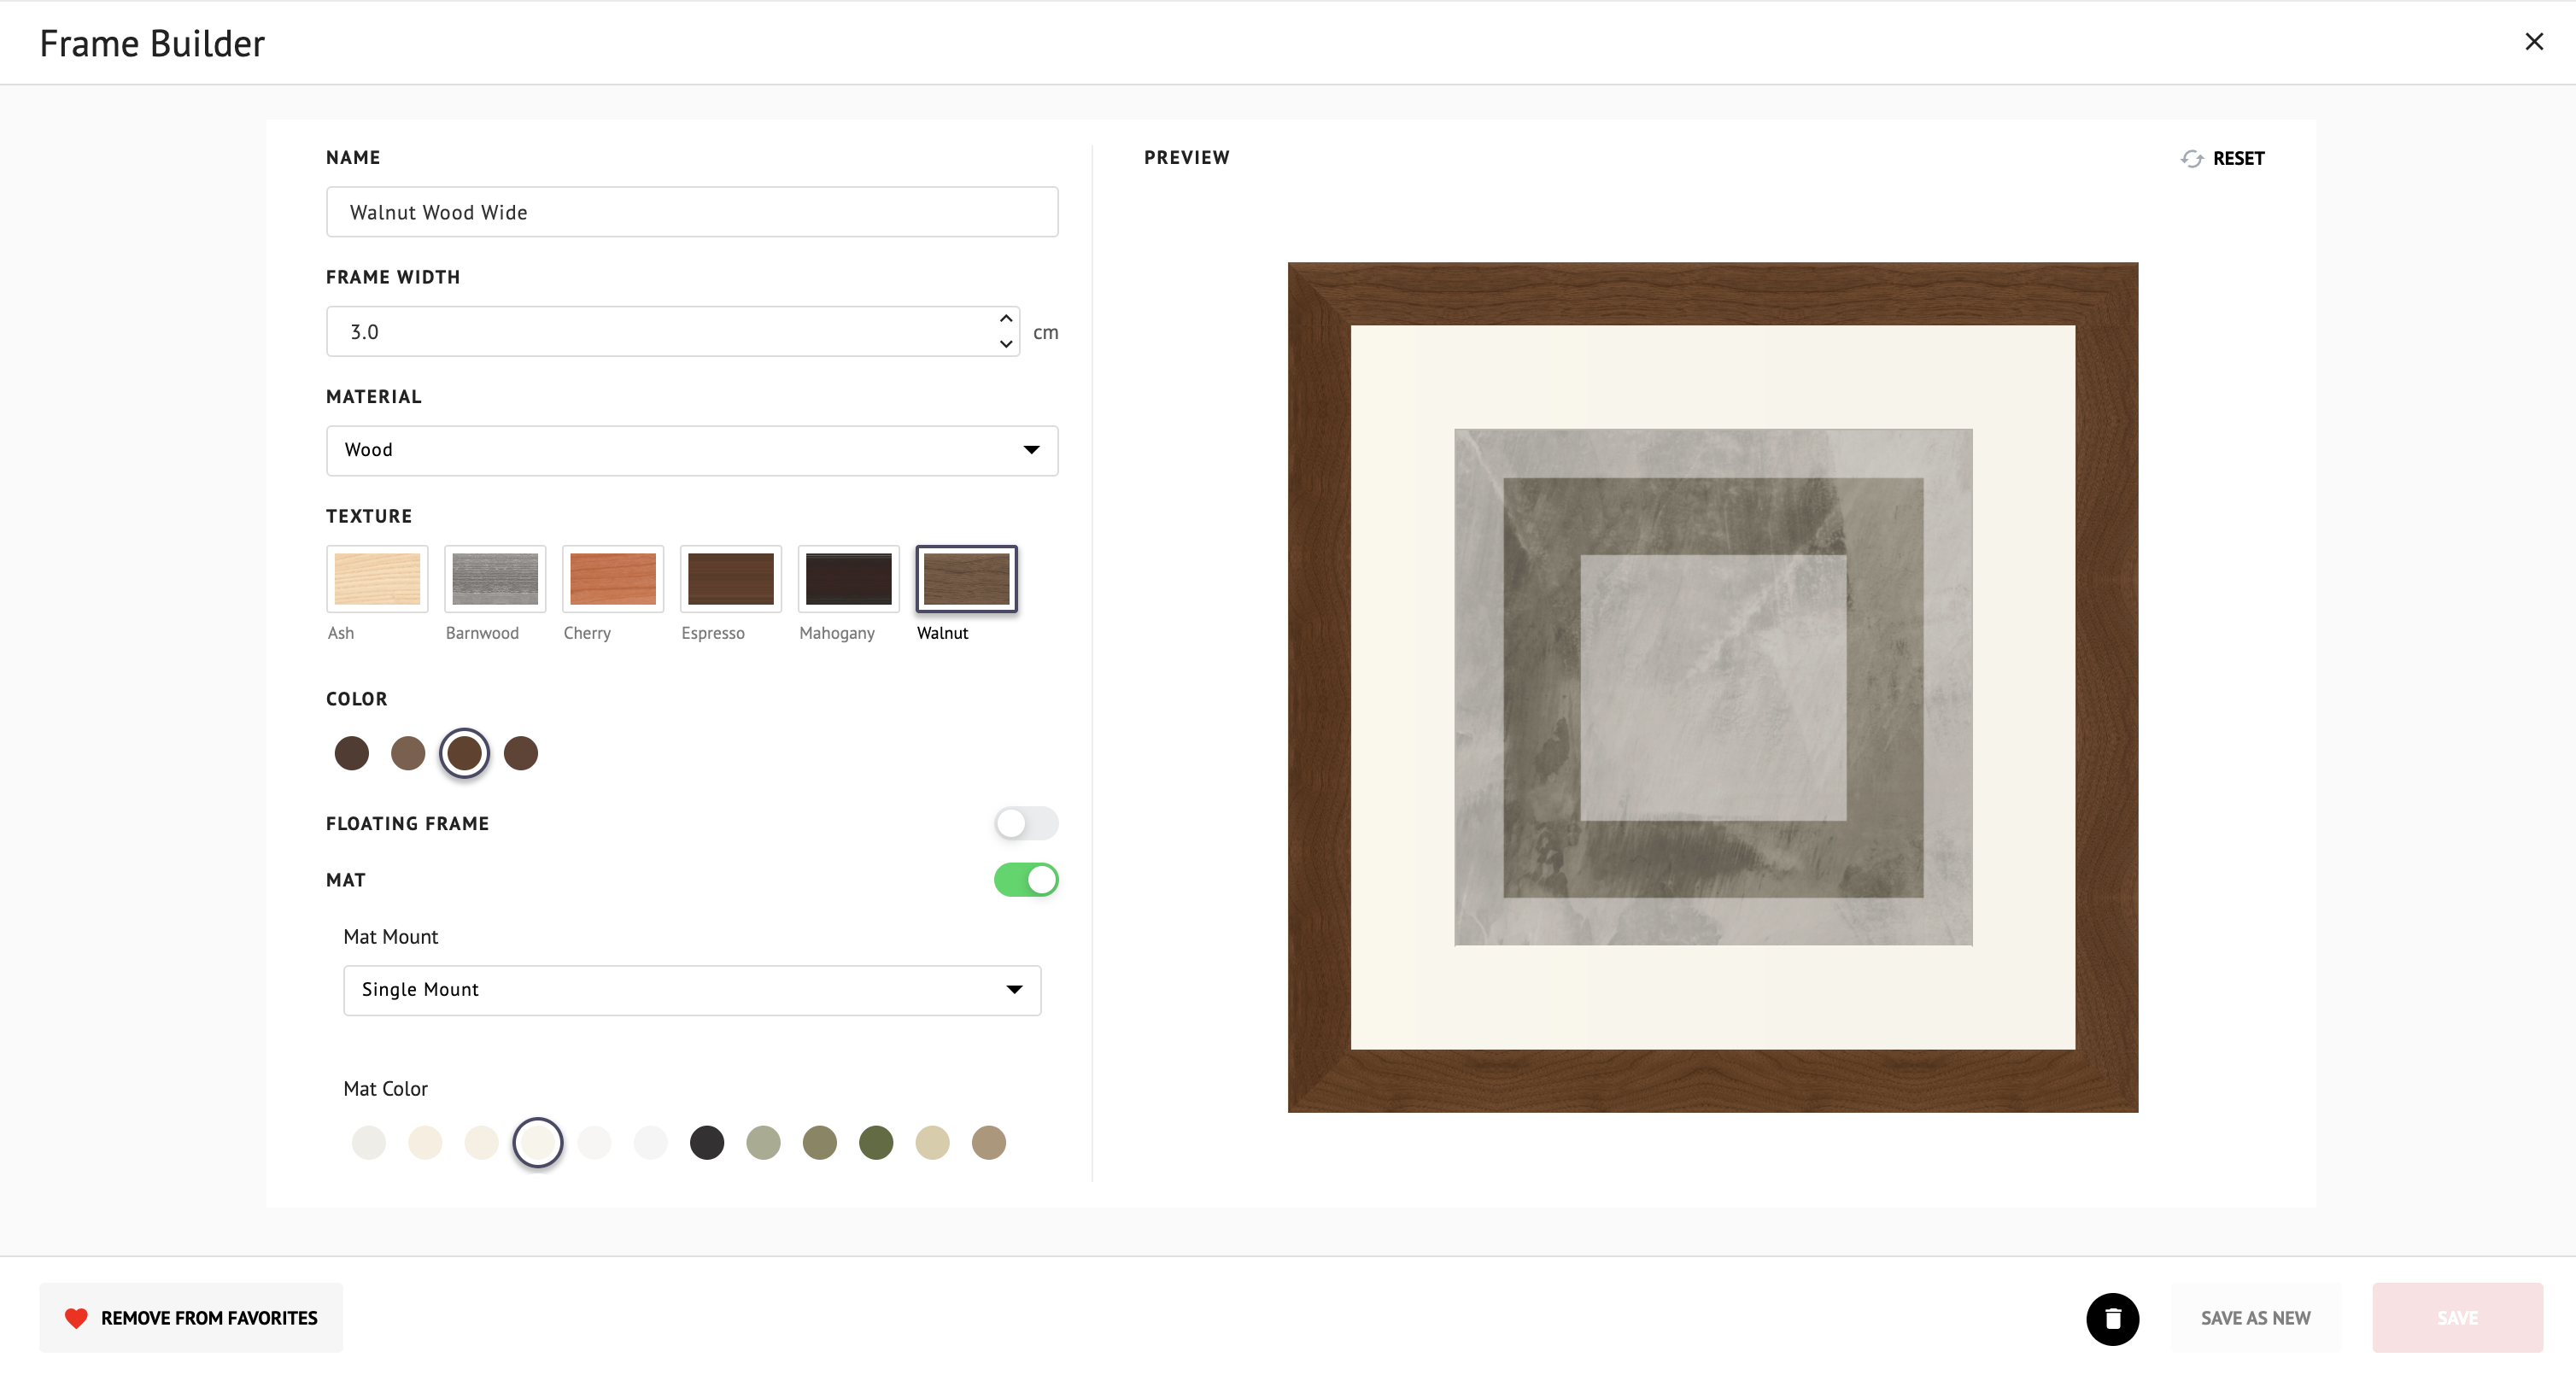
- To edit a frame, click the pencil icon on its thumbnail to open the Frame Builder. Make your changes, then click SAVE to overwrite the original, or SAVE AS NEW to keep the original and create a new one.
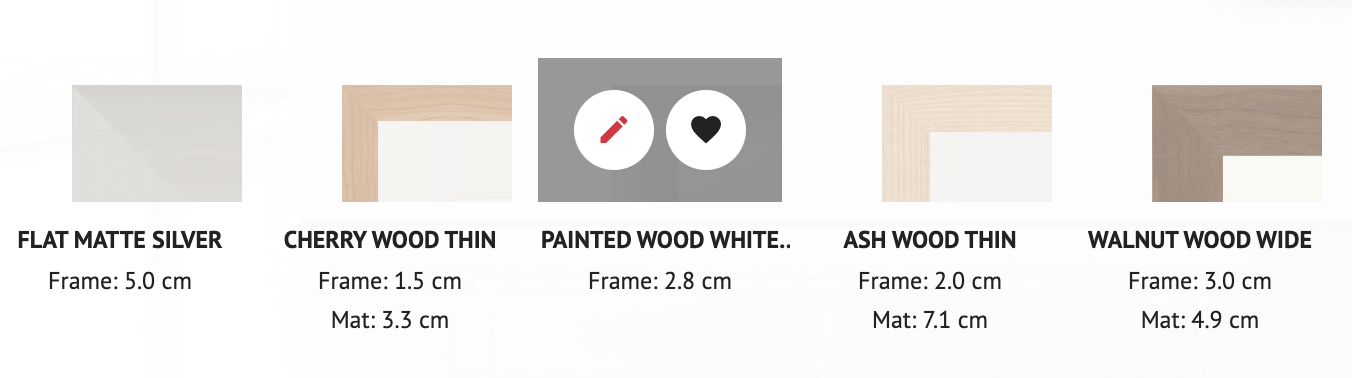
- To design a frame from scratch, click CREATE, build it, and click SAVE.
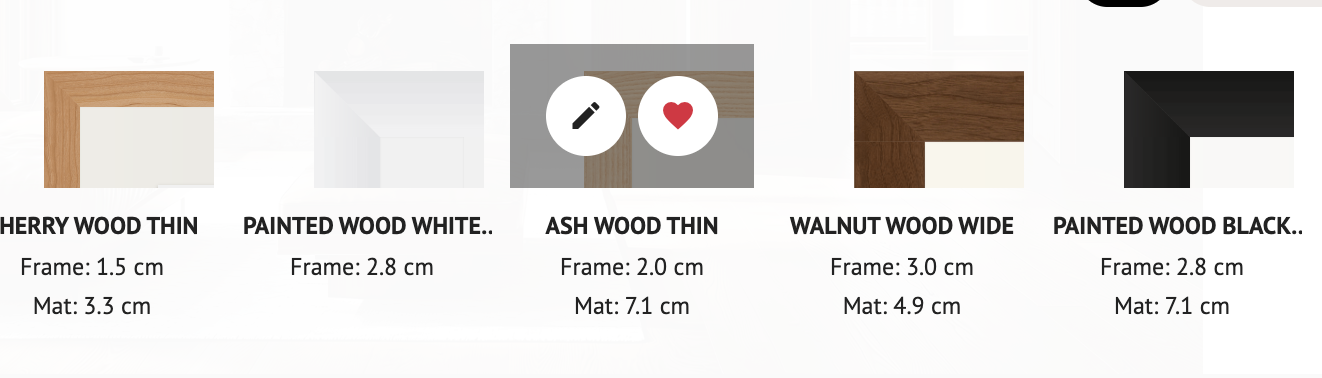
- To keep your favorite frames handy, hover over a frame and click the heart icon. You’ll find them under My Favorites, next to the Frames search bar.
Tip: You can also add a frameless mat board, with equal or different sizes on each side, and choose white, black, or mirror borders for canvas pieces.
⚠️ Custom frames can’t be used in Virtual Exhibitions. Only the default ArtPlacer frames are available there.
Want to show only your framed piece? Search for the room called “Background” in Room Mockups. It’s a Smart Space, so you can change the wall color.
5. Use the Bottom Controls to Customize Your Mockup
LIGHTING
- Select the Artwork (or several, holding Shift) and click LIGHTING.

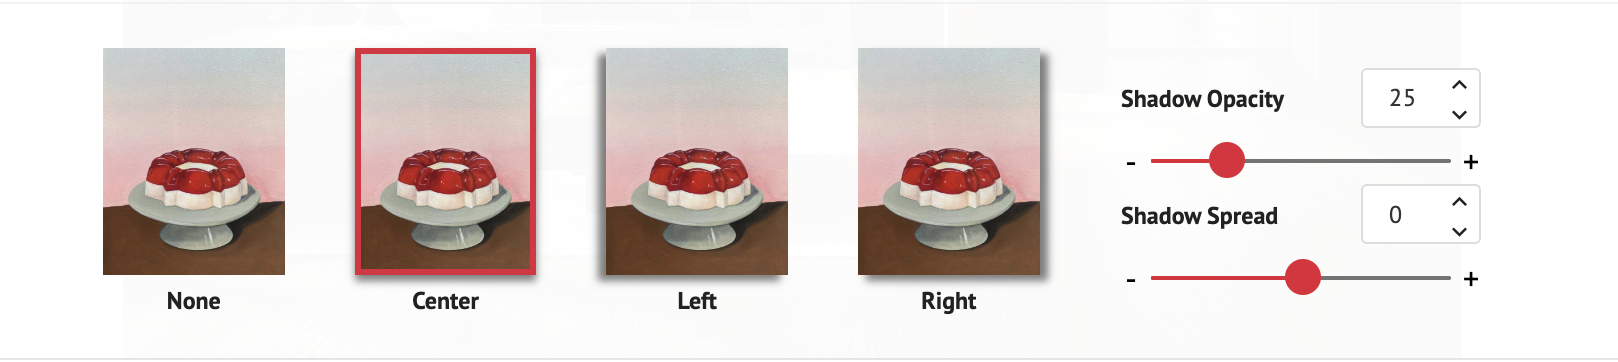
- Choose CENTER SHADOW, LEFT SHADOW, or RIGHT SHADOW for the shadow direction, or NO SHADOW to remove it. Then, fine tune it's spread and opacity
- Customize the Artwork’s and Space’s brightness and contrast with the sliders or the fields above them.

- Click Reset Filters to go back to the original look.
Tip: Match the shadow to the room’s light source, like a window or a lamp. Keep the Artwork’s brightness similar to the objects around it, so it feels part of the space.
SIZE
- Select the Artwork and click SIZE.
- Type the Artwork’s height (H) and width (W).
- Click the reset icon to return to the original size.

POSITION
- Select the Artwork and click POSITION.
- Under Align artworks, choose an option to align the Artwork with the wall. If you’ve selected several Artworks, the same options align them with each other.
- Click Rotate to turn the Artwork 90 degrees.

⚠️ Rotate only works when a single Artwork is selected. If you select more than one, it is disabled.
⚠️ Distribute is only available when you’ve added and selected three or more Artworks. It spaces them evenly, and you can choose between two options, one for each direction.
CUSTOMIZE (Smart Spaces only)
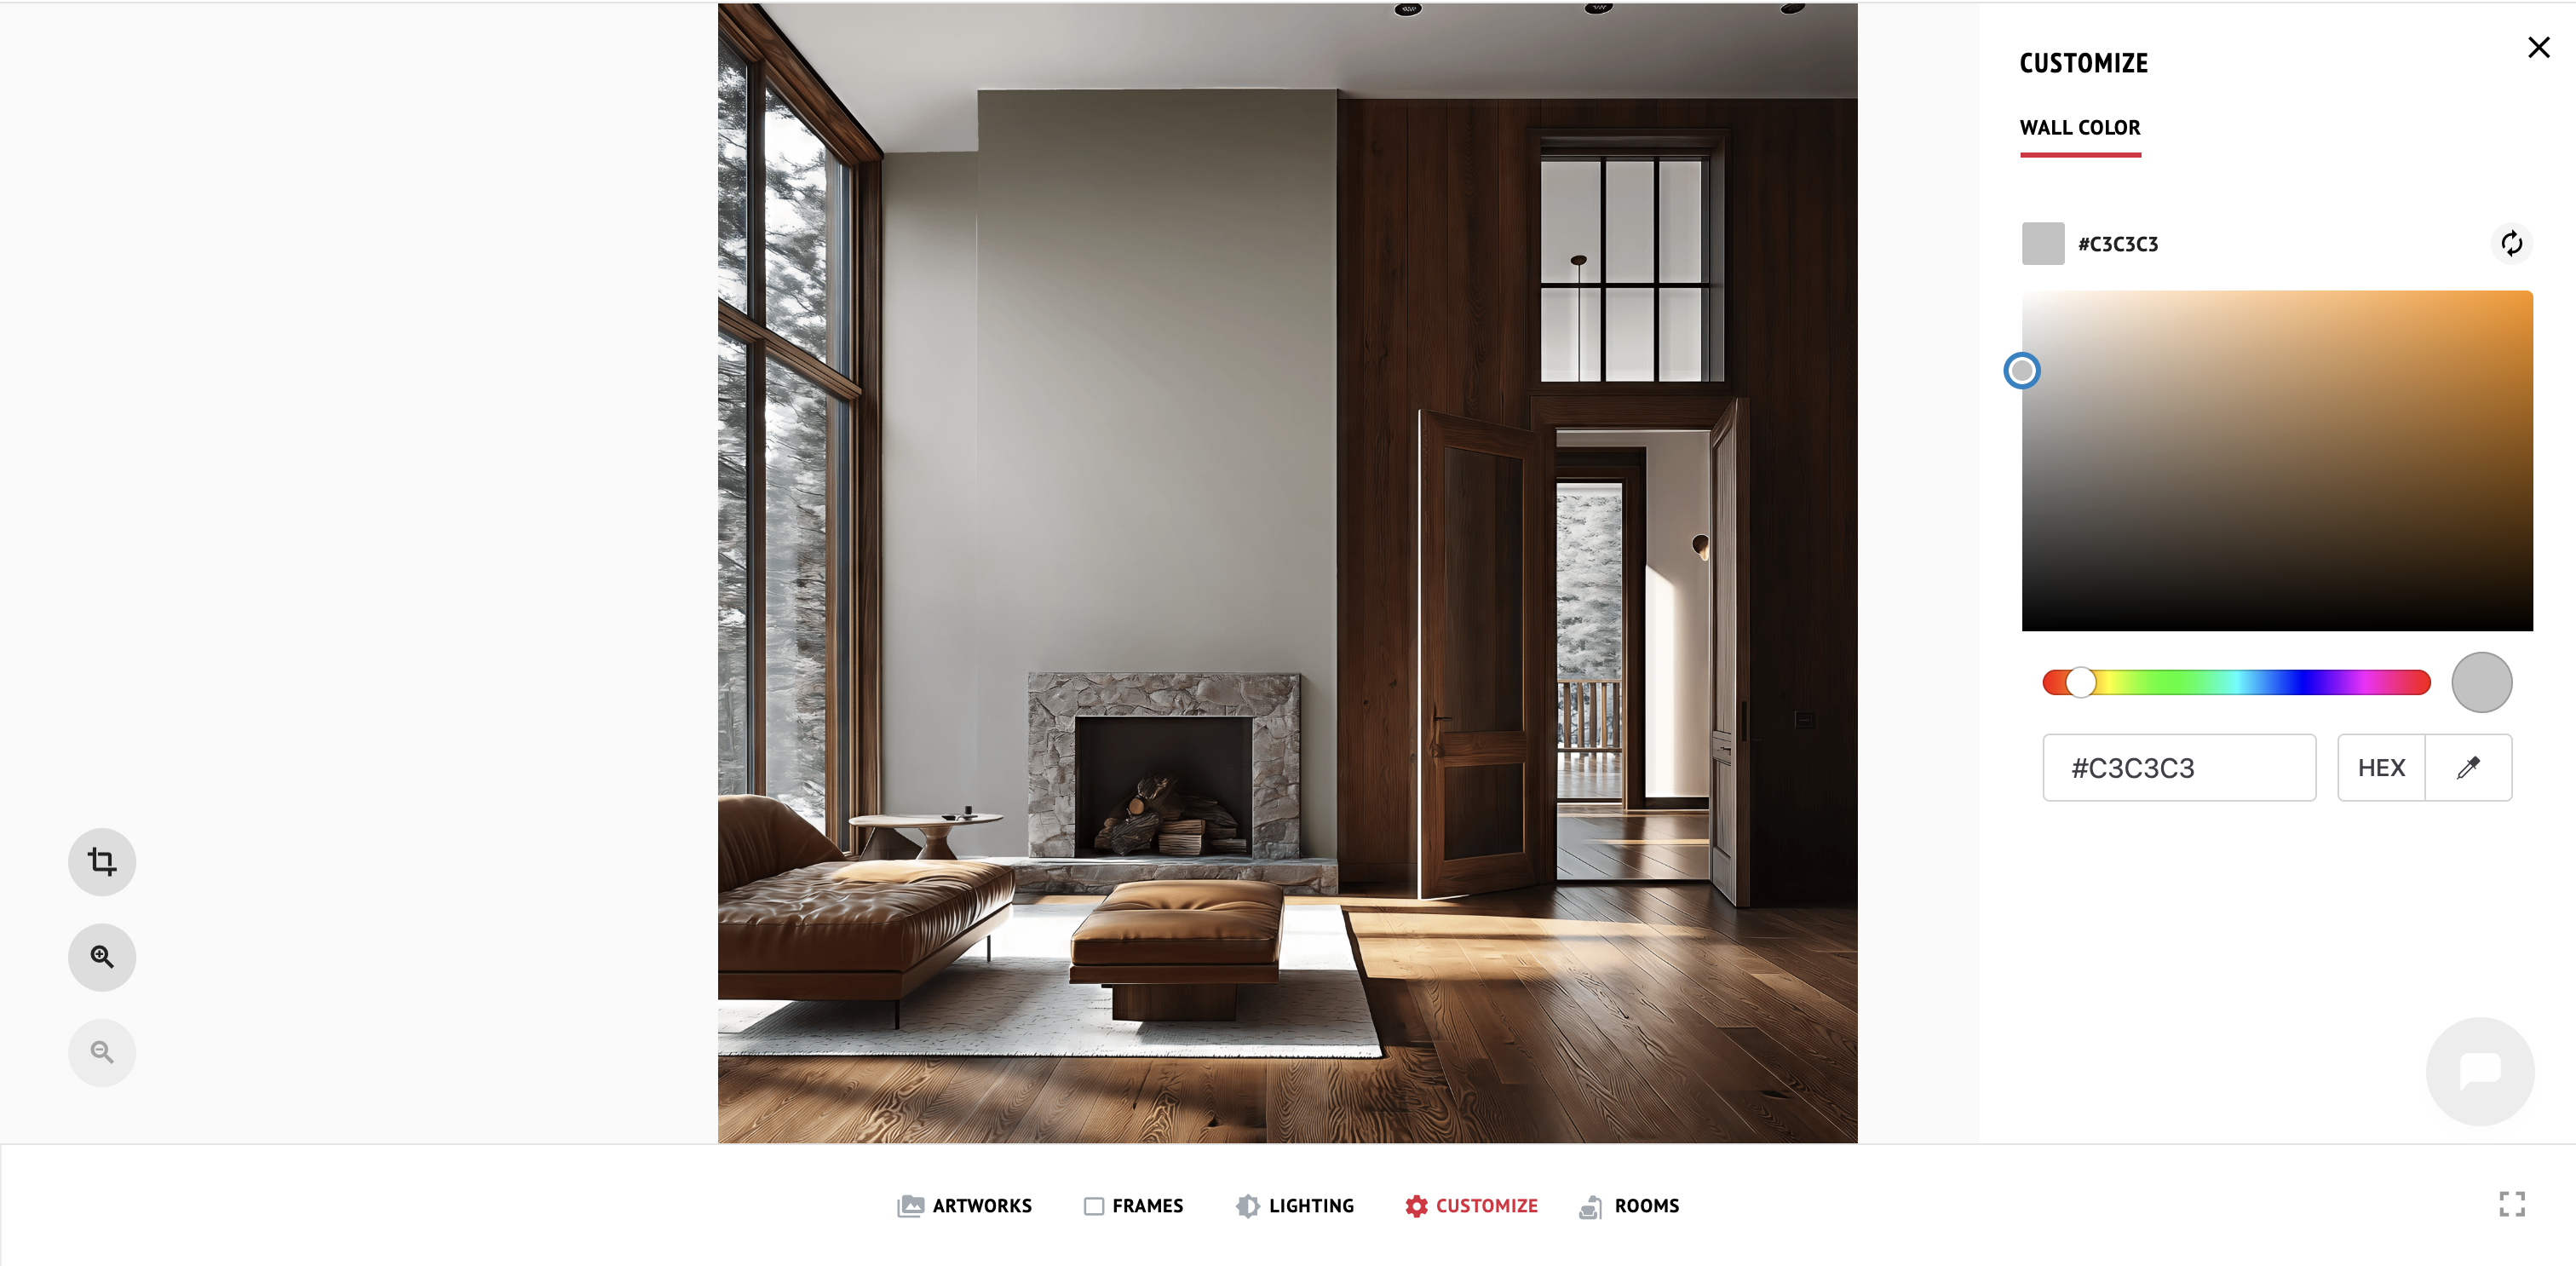
- Click CUSTOMIZE.
- Use the slide bar to pick a color range and the color picker to change the wall color, or enter a color code.
ROOMS
Switch to a different room while keeping your Artwork in place. You can also create mockups in several rooms at once. See the next section.
Other handy tools
- Undo: Press Ctrl+Z (Windows) or Command+Z (Mac), or click the undo icon in the bottom left corner.
- Zoom: Click the zoom icons in the bottom left corner to get closer to your room.
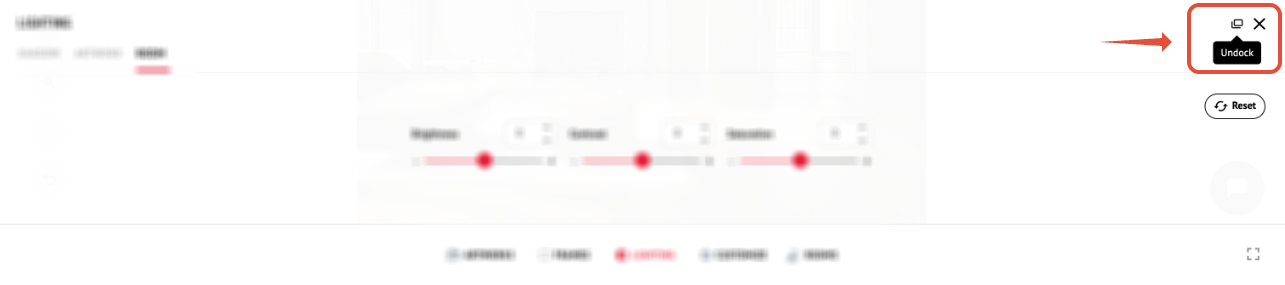
- Floating panels: Click the icon next to the X on a panel to make it float, so you can see the whole room while you edit.
6. Try Your Artwork in Other Rooms
This step is completely optional. It’s for creating mockups in several rooms at once. If you’d rather create your mockups one by one, skip ahead to Step 7: Crop Your Design.
The ROOMS button is a quick way to see your Artwork in other spaces without starting over. You can switch the room you’re working on, or create mockups in several rooms at once.
- Place at least one Artwork in your room and set it up the way you like, with frames, lighting, and so on.
- Click ROOMS at the bottom of the screen.

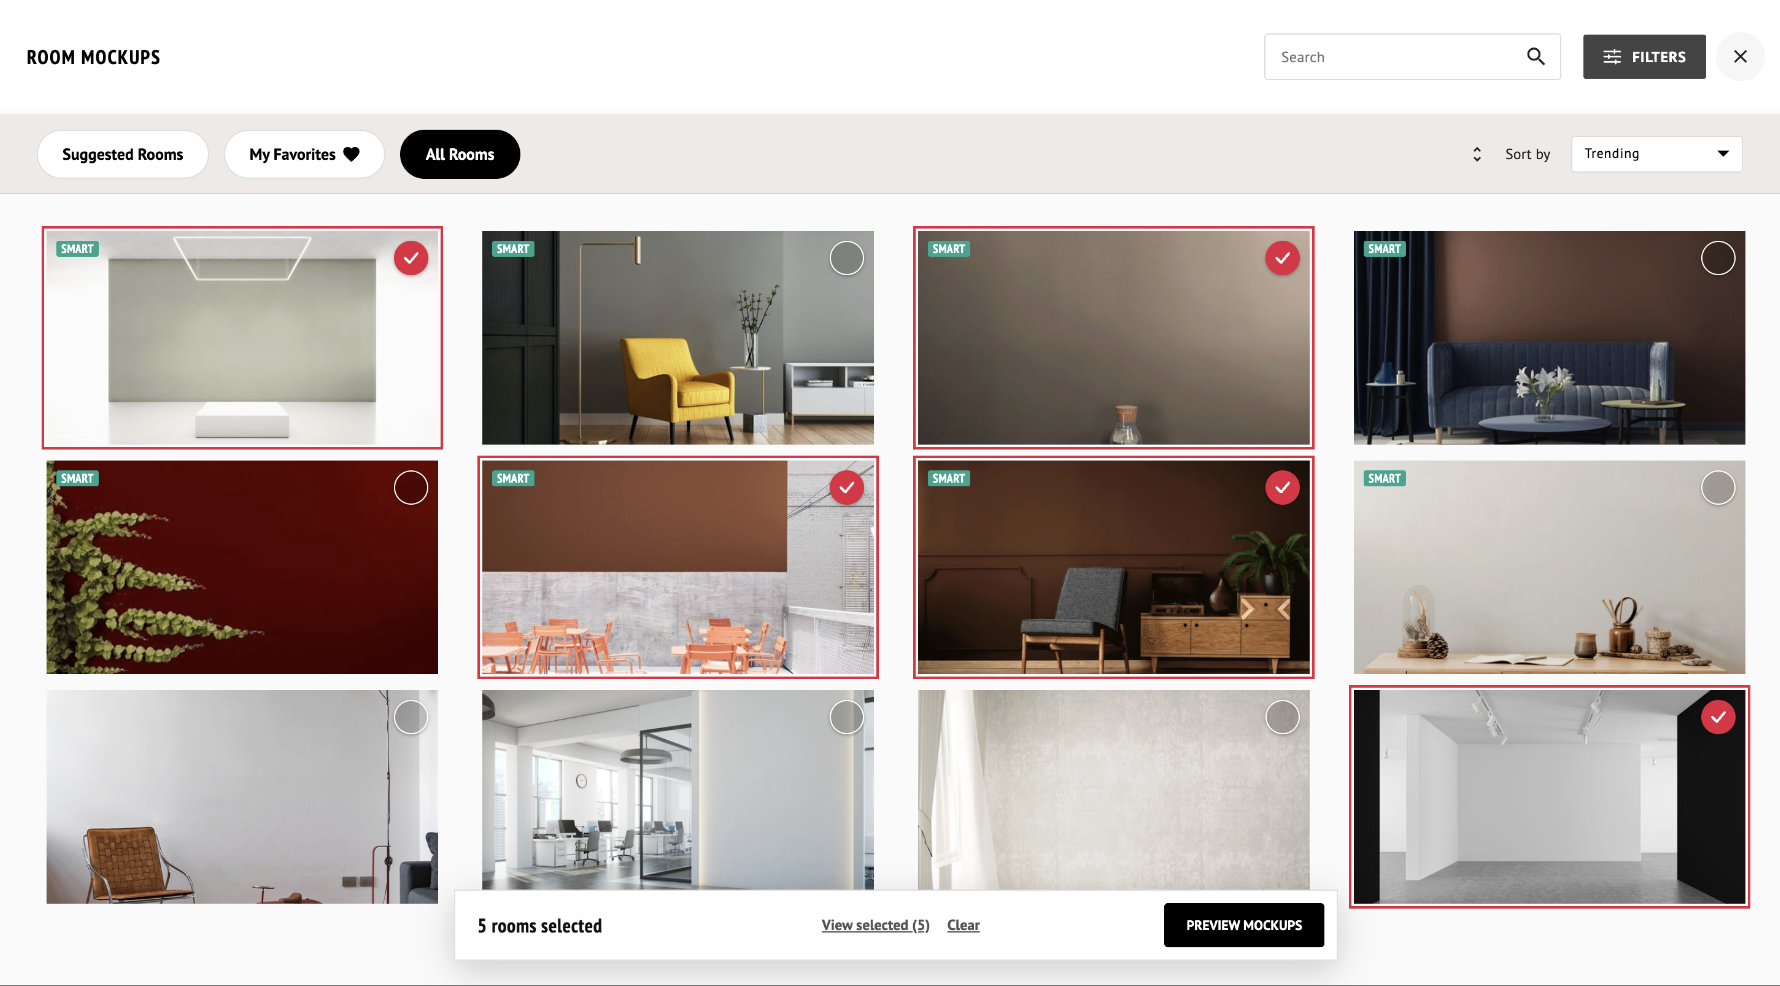
- A ROOM MOCKUPS window opens with three tabs: Suggested Rooms, My Favorites, and All Rooms. You can also search, use FILTERS, and change Sort by.
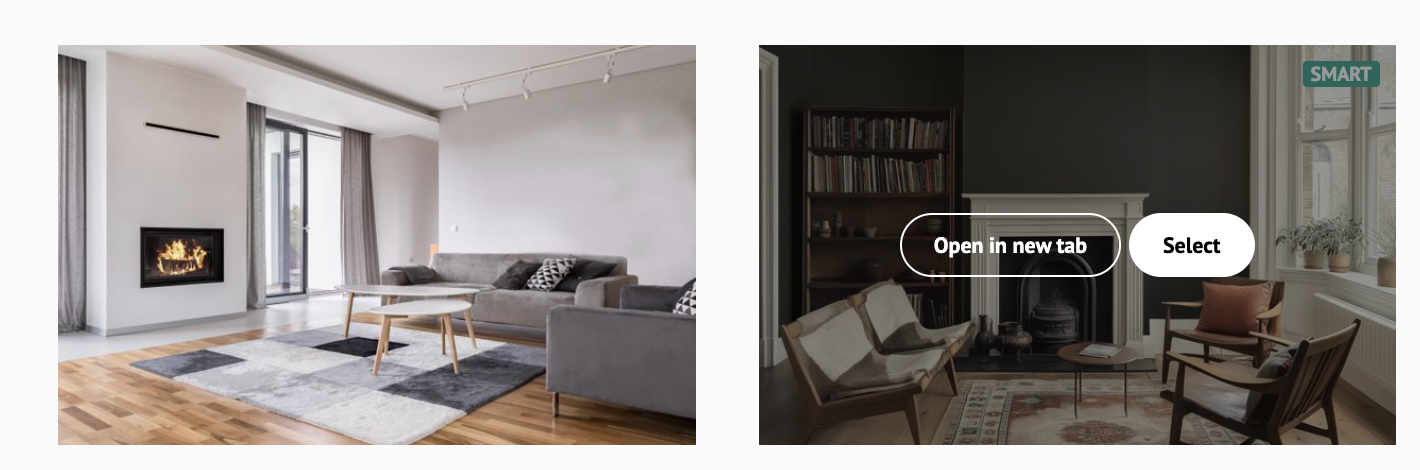
- To move to a single room, hover over it and click Use this room. To look at it first, click Open in new tab.
- To create mockups in several rooms (in bulk), go to All Rooms and select each room you like.
- A bar at the bottom shows how many rooms you’ve selected. Click View selected to see them all together, Clear to start over, or PREVIEW MOCKUPS to continue.
- In the Review and select your Instant Mockups window, you’ll see your Artwork placed in each room you chose. Your Artwork, frames, and settings from the original mockup are carried over to every room.
- From here, click SAVE or DOWNLOAD MOCKUPS. To add or change rooms, click Edit selection.
Save your mockups
- Click SAVE.
- Choose Add to existing folder or Create new folder, and type a folder name if you’re creating one.
- Click SAVE. Your mockups are saved as designs in My Designs.
Download your mockups
- Click DOWNLOAD MOCKUPS.
- Choose a size: Small, Medium, Large, or Full size.
- Click DOWNLOAD.
⚠️ Unlike Instant Mockups created from the Artworks page, here you can’t choose which mockups to save or download. All the rooms you selected are included. If you’d like to pick individual ones, save them all as designs and download just the ones you want from My Designs.
7. Crop Your Design
Crop your design to the exact size you need, from free-form cropping to ready-made formats for social media.
- Click Crop in the bottom left corner.
- Choose a method:
- Manual Crop: Drag the handles on the edges to crop one side, or the corners to crop two sides at once.
- Custom Size: Open the dropdown (the default is Original Size), select Custom Size, and enter the Width (W) and Height (H). Use the lock icon to keep proportions, or the reset icon to start over.
- Standard Size: Choose a ready-made format for Instagram, Etsy, Facebook, Pinterest, YouTube, or X.
- Manual Crop: Drag the handles on the edges to crop one side, or the corners to crop two sides at once.
- Click DONE.
Tip: You can crop any room to focus on a smaller Artwork, even if it isn’t a Small Art room. You can also save each crop as a new design to keep several versions of the same creation.
8. Save, Download, or Share
Save
- Open the three dots menu in the top right corner.
- Click Save New Design.
- Add a title and click SAVE.
You’ll find it in My Designs.
Download
- Click EXPORT in the top right corner and select DOWNLOAD.
- Choose a size: Small, Medium, Large, Full size, or enter a custom size.
- Click DOWNLOAD.
Share
Click EXPORT and choose how to share: Instagram, Facebook, WhatsApp, a public link you can copy and paste anywhere, or email.
Make a video
You can turn your design into a short video with Room Mockup Video. Learn more here: Room Mockups to Video