Table Of Contents:
- Initial Consideration
- What is a Viewing Room?
- How Viewing Room Works for You
- How to Create a Viewing Room
- Troubleshooting
Initial Considerations
- An active trial or a Plus, Professional, Growth, or Premium plan is required to access this feature.
- You must upload your artworks to your ArtPlacer account and include all the relevant information you wish to display on the labels, such as Year, Medium, Material, Dimensions, and Price.
Learn more on how to upload artworks here.
What is a Viewing Room?
ArtPlacer's Viewing Room is an immersive, customizable micro-site designed to showcase selected artworks. It offers an easy-to-share platform for engaging your target audience and potential buyers.
Once the Viewing Room is accessed, visitors can interact with widgets that allow them to upload a photo of their own space, such as a bedroom, living room, or office, and virtually place the artwork within it.
Additionally, they can view the art in real-time using augmented reality, enhancing their experience and connection to the pieces. 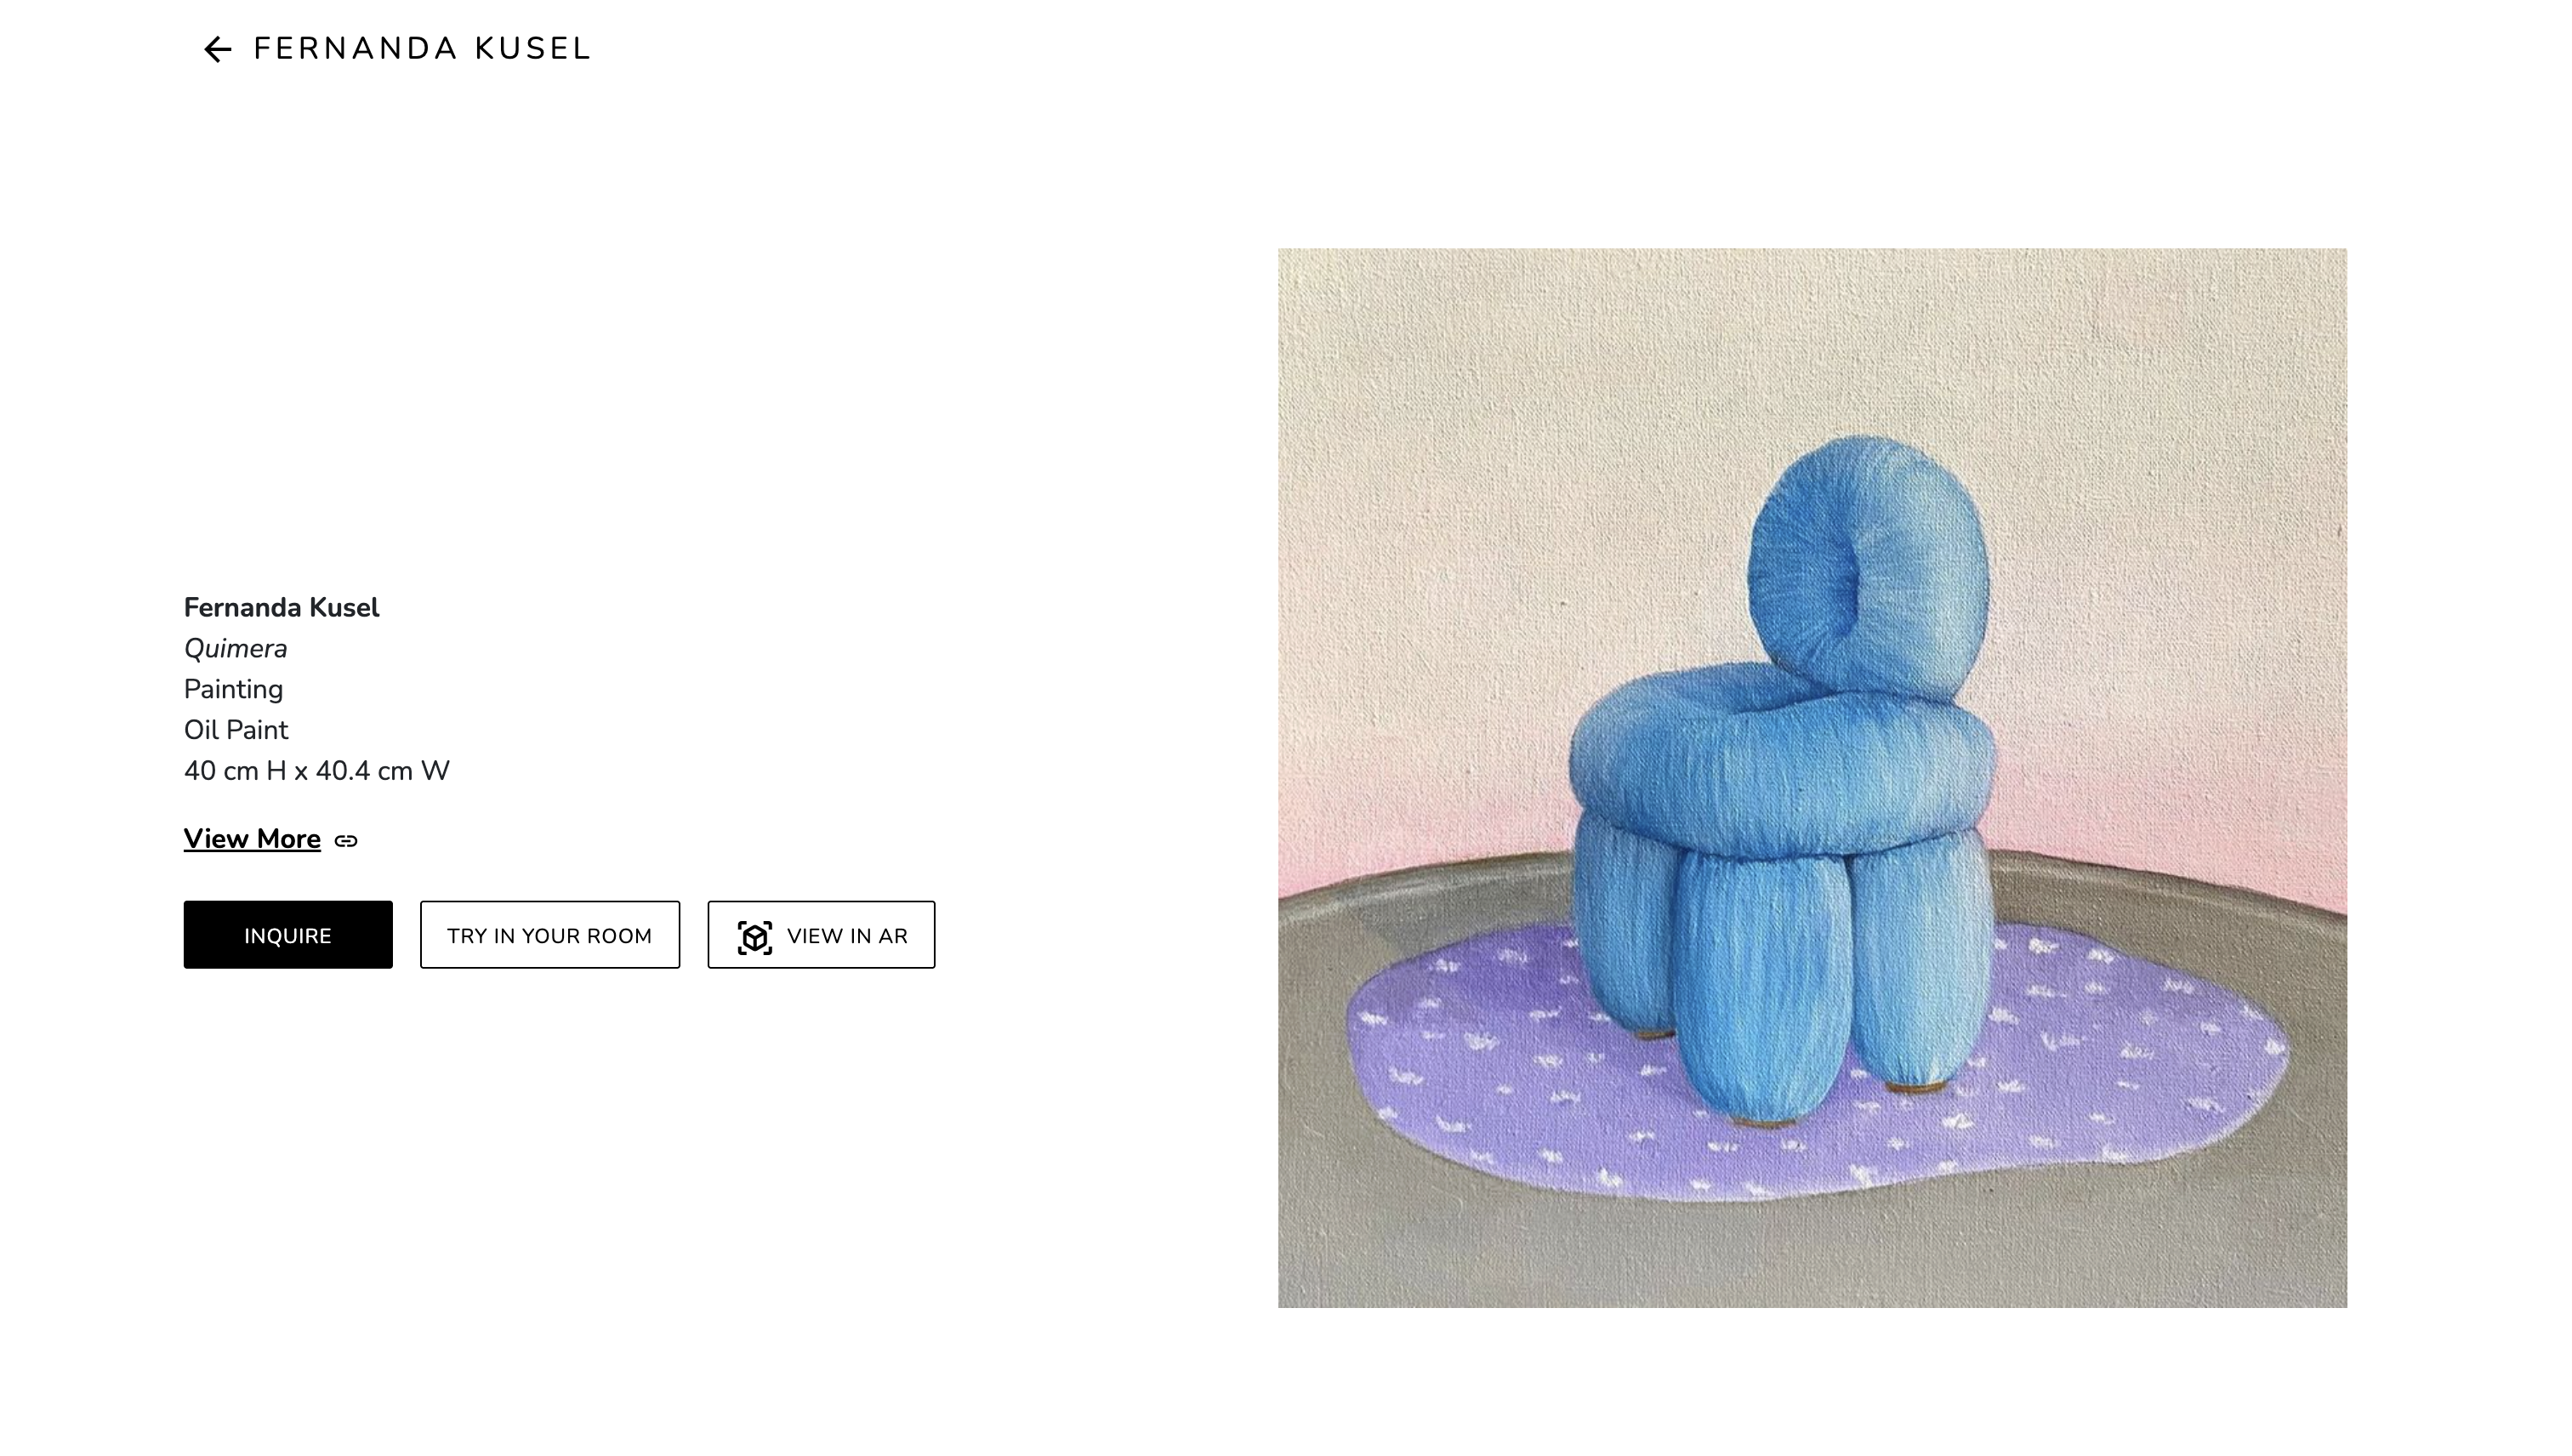
How Viewing Room Works for You
Here are some ideas to make the most of this feature, depending on your artistic role:
- Gallery: Offer in situ show replicas via QR codes, create artist Viewing Rooms on iPads to drive sales, and provide bespoke experiences tailored for top collectors. Develop custom online sites for client-specific requests, and grant exclusive previews of physical exhibitions to select visitors. Perfect for elevating engagement and driving sales.
- Artist: Create a replica of an in situ show, easily accessible via a QR code placed in your booth or gallery. Showcase commissioned artworks tailored to client preferences, and highlight calls for artists, grants, residencies, or opportunities for gallery representation. All in one dynamic presentation.
- Art Dealer: Deliver a bespoke experience that caters to your clients’ needs with personalized curation, descriptive texts, and visuals of art placed on their walls. Offer tailored solutions based on their collaboration with the art dealer, including curated presentations for residential or commercial projects. Perfect for homes, hotels, coworking spaces, or offices!
- Photographer: Create a viewing room that replicates an in situ show and provide instant access with a linked QR code. Perfect for placing in your gallery or art fair booth to captivate visitors!
How to Create a Viewing Room
To begin, open this section, go to Sidebar > My Creations > Presentations, and click "NEW" > New Viewing Room.
Or click Quick Creations > New Viewing Room from the Artworks section using Bulk Actions.
- Configure Your Viewing Room
- Start by assigning an Artist or Art Business Name (mandatory).
- Upload a Brand Image (Optional)
- Assign a title (Mandatory).
- Optionally, add a Subtitle, Open and Close Dates.
- Choose the Hero Layout and Top Bar Placement.
- Upload your Hero Image (max 4 MB, JPG/PNG) and click Save and Continue.
2. Select Artworks
- Choose the artworks to display (ensure their details are pre-added in the Artworks section).
- Select the Artwork Details you want to include, such as Year, Medium, Material, Dimensions, and Price.
- Select your preferred Display Grid and Grid Layout
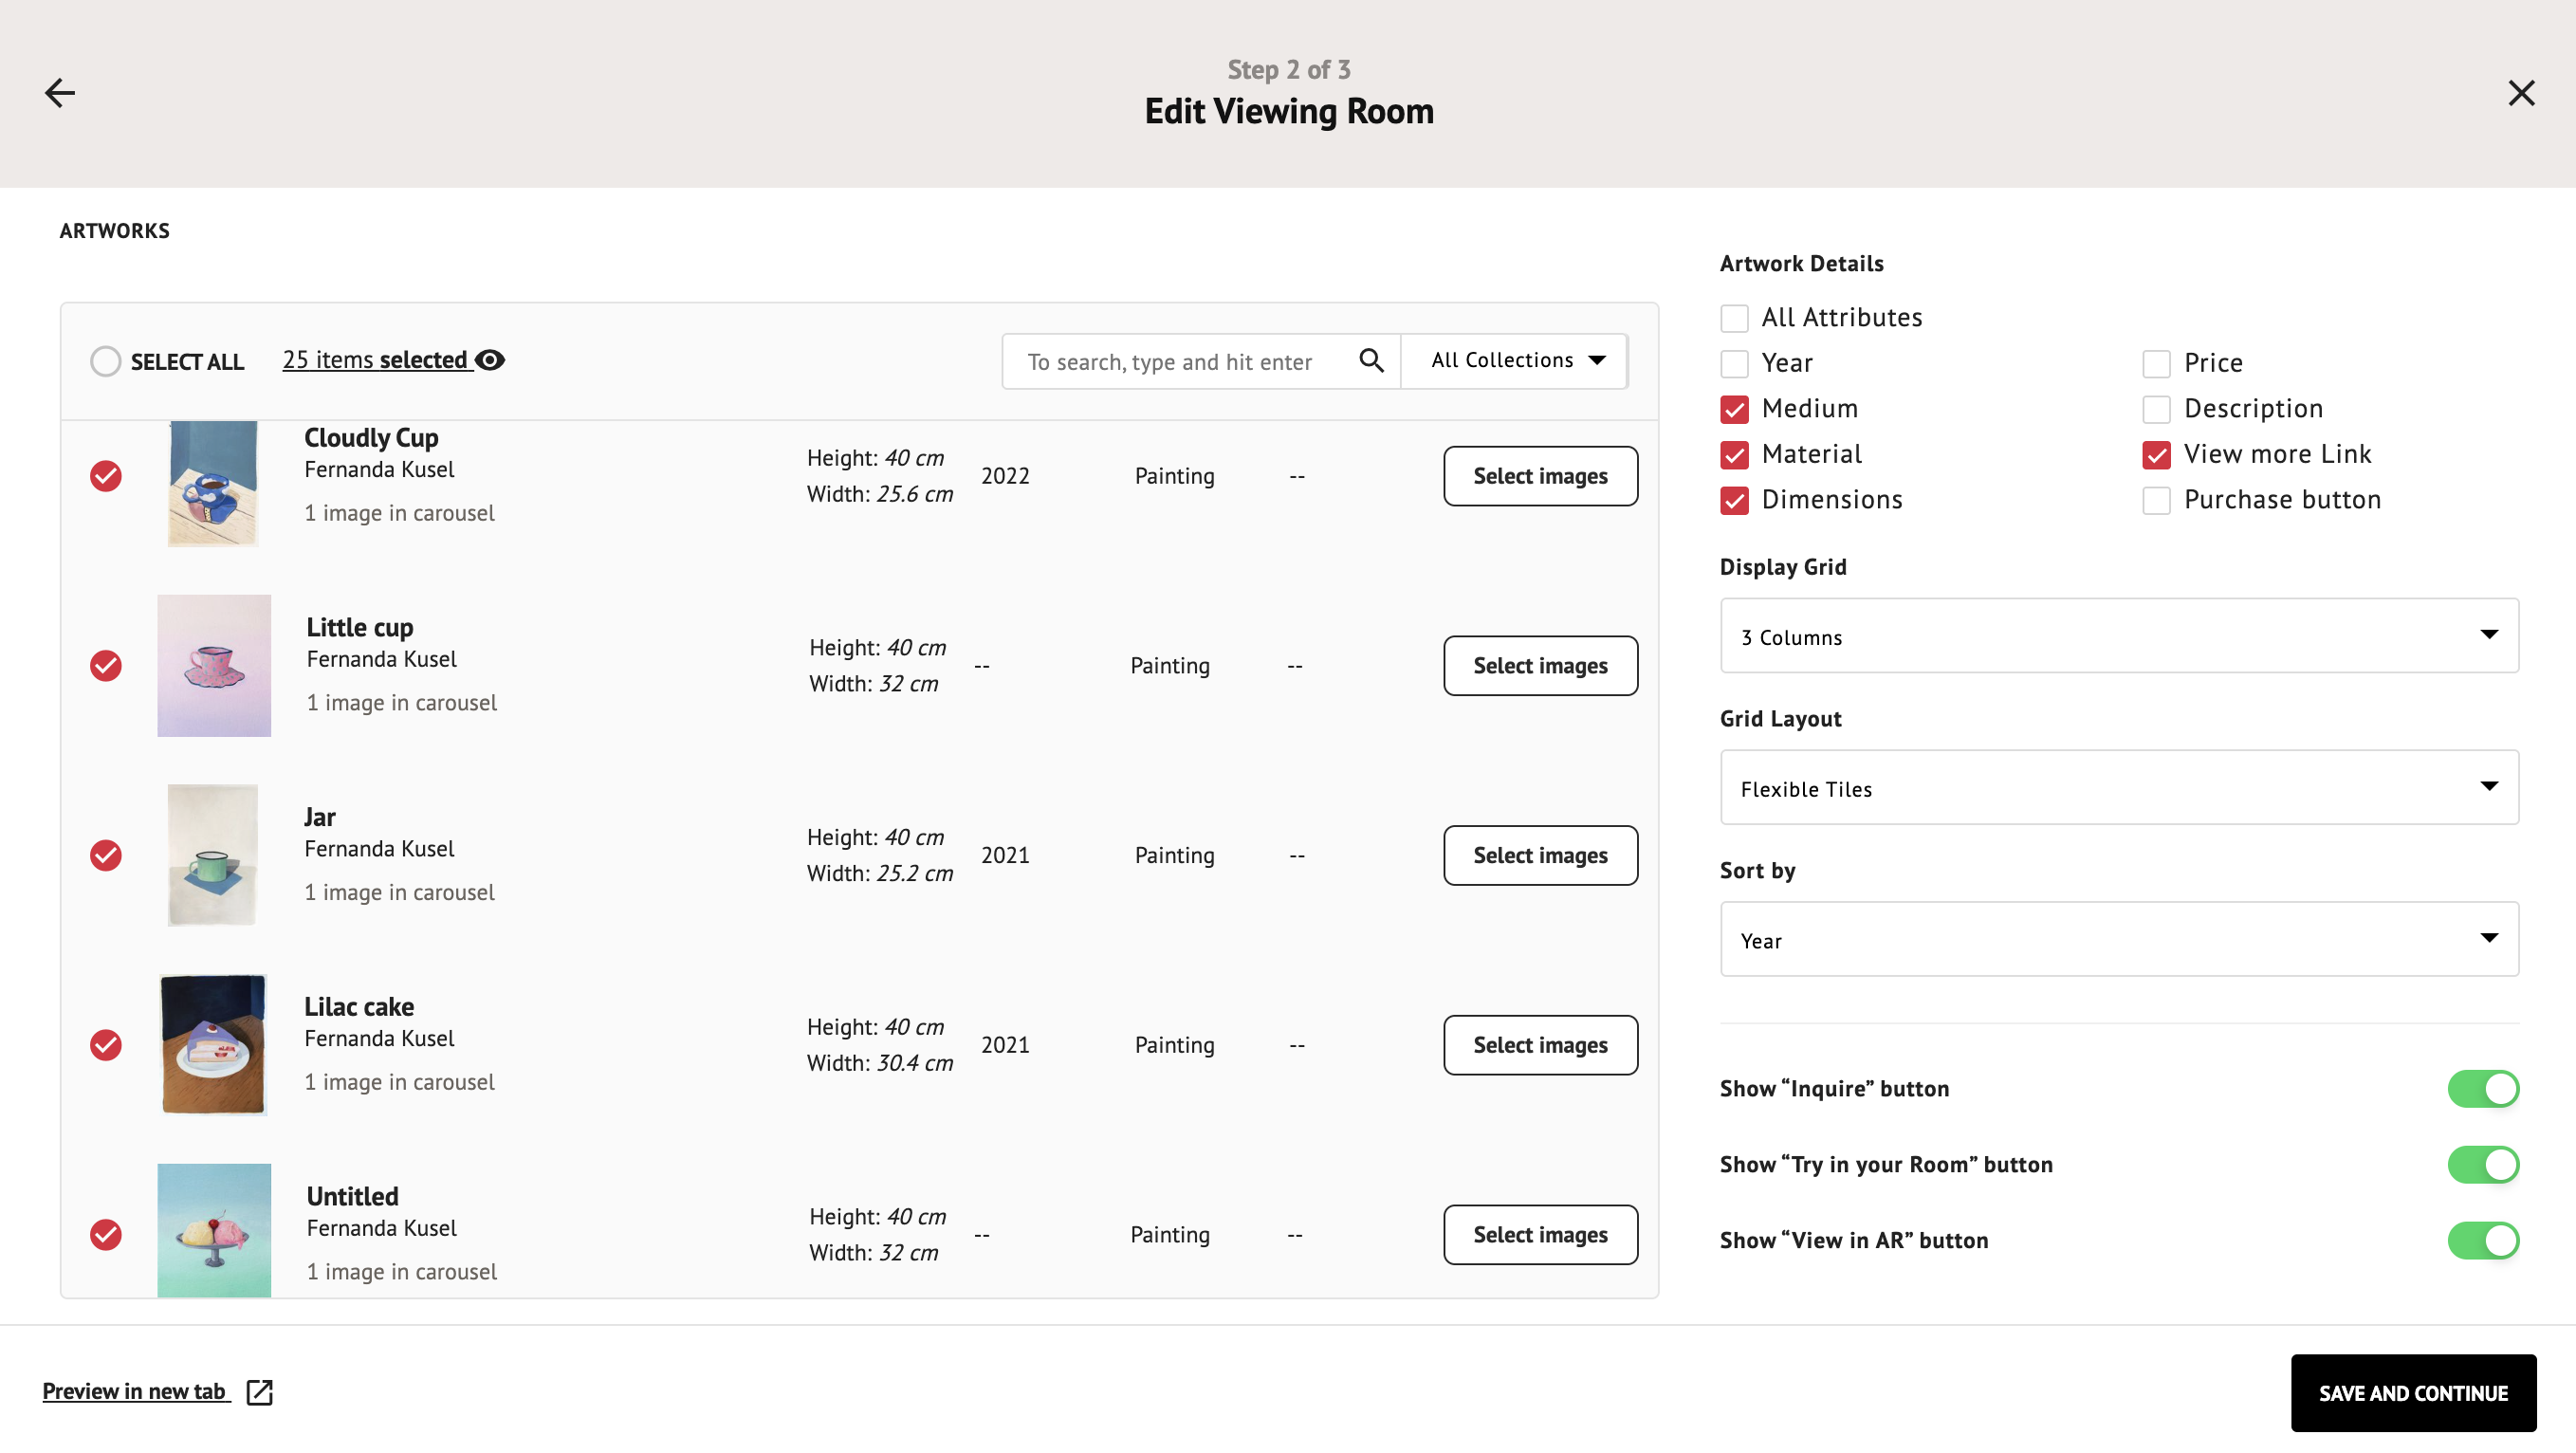
- Sort the Artworks by Artwork Title, Artist Name, or Year.
- Customize your Buttons: Inquire, Try in Your Room, and View in AR.
- (Optional) Add more images to an Artwork page, such as your designs from My Designs. See "Add More Images to an Artwork" below.
Add More Images to an Artwork
Think of your Viewing Room as a small website, where each artwork has its own product page. When a visitor clicks an artwork, they land on that page: the artwork's details and buttons on one side, and a gallery of images on the other.
The "Select images" button is where you build that gallery. You choose the cover, which is the first image visitors see, and then add your designs from My Designs as a carousel they can browse. This helps collectors see how the piece looks in real spaces, before they even try it in their own room.
You can add up to 6 images per artwork, including the original.
- Select your Artworks: Click the artwork you want to build a page for. A Select images button will appear on its row.
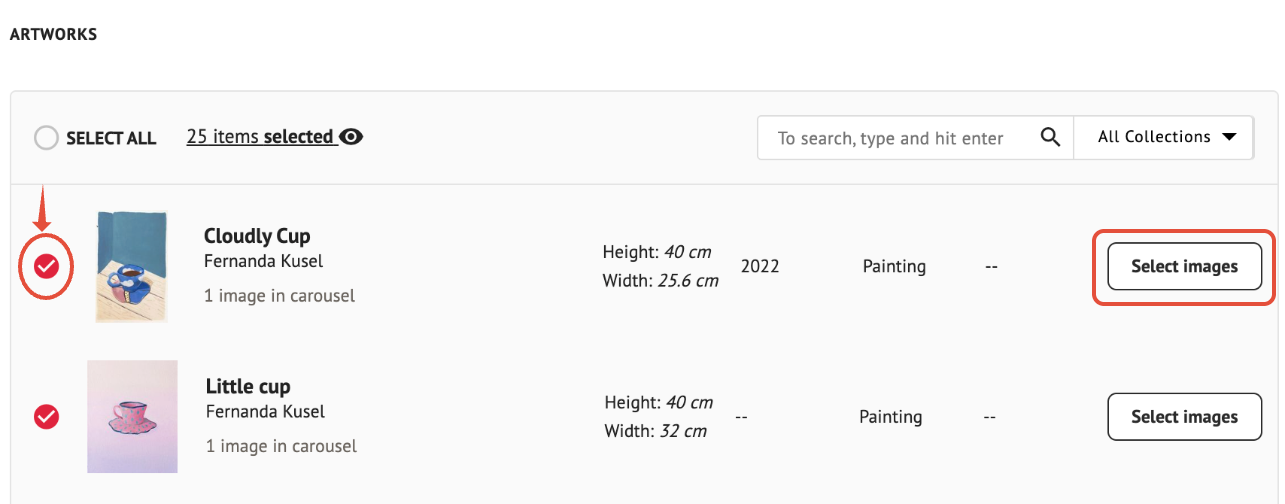
- Open the image gallery: Click Select images. A window called "Images for this artwork" will open.
At the top, you'll see the artwork's current cover. Right below it, IN THIS VIEWING ROOM shows the images that will make up the carousel. By default, it only has your original artwork image.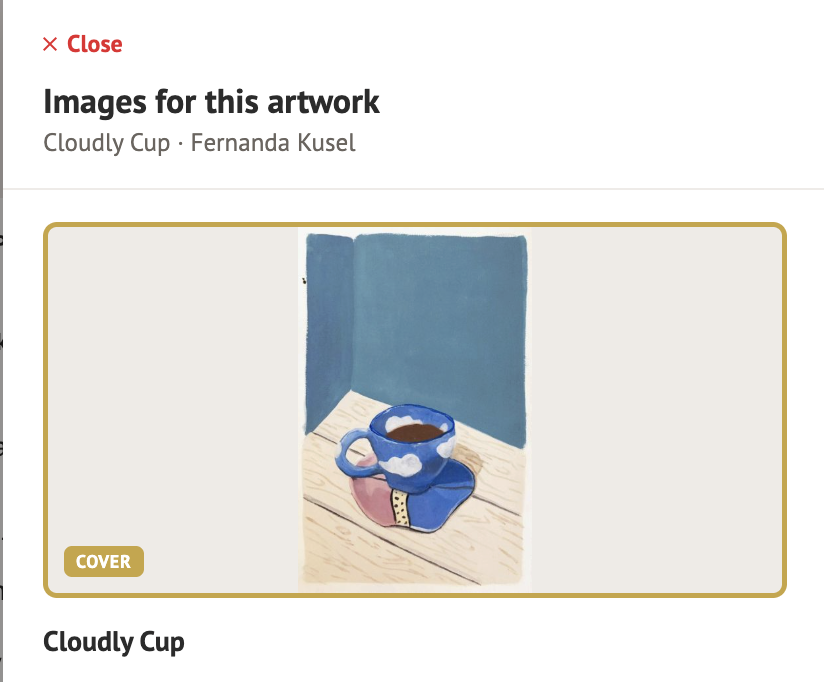
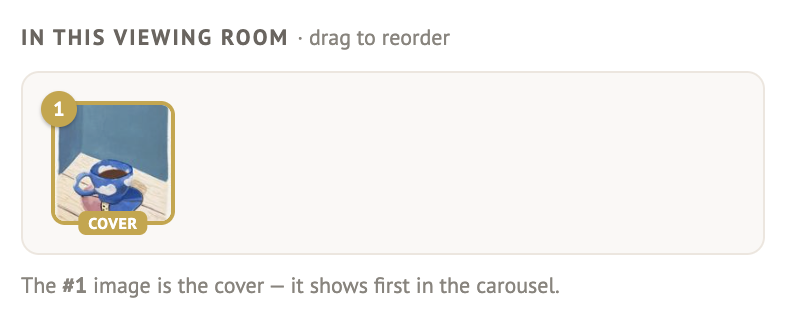
- Choose your designs: Scroll down to MY DESIGNS, where all your saved designs are listed. Click each design you'd like to add. If you have many, type a name in the search bar to find it faster.
Each design you select gets a checkmark and is added to your carousel.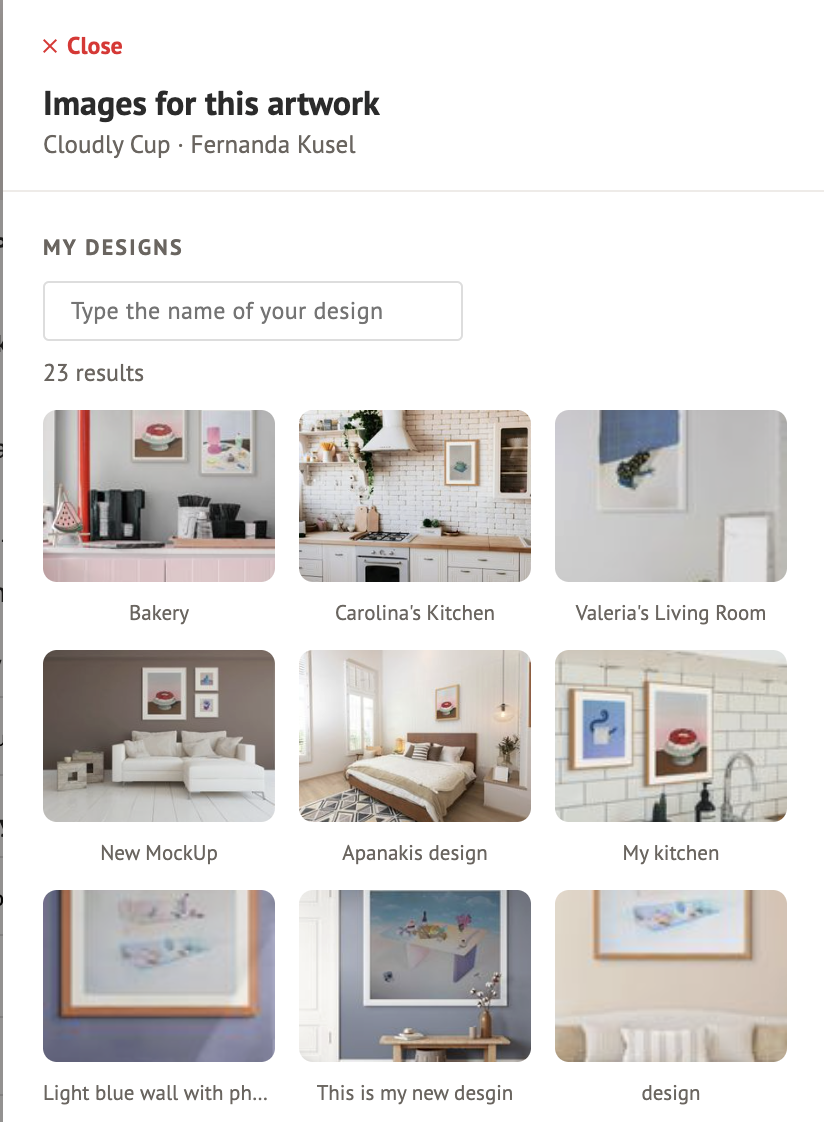
- Put your images in order: Once you've selected all your images, scroll back up to "IN THIS VIEWING ROOM · drag to reorder." Drag and drop the images to rearrange them, and place the one you'd like visitors to see first in position #1. That image becomes the cover.
- Check your progress: The bar at the bottom of the window shows how many images you've used, for example "3 of 6 images · #1 is the cover". You can add up to 6 images per artwork, including the original.
- (Optional) See how it looks: Click Preview published page at the bottom of the window. A new tab will open showing this artwork's page, with the cover and the carousel.
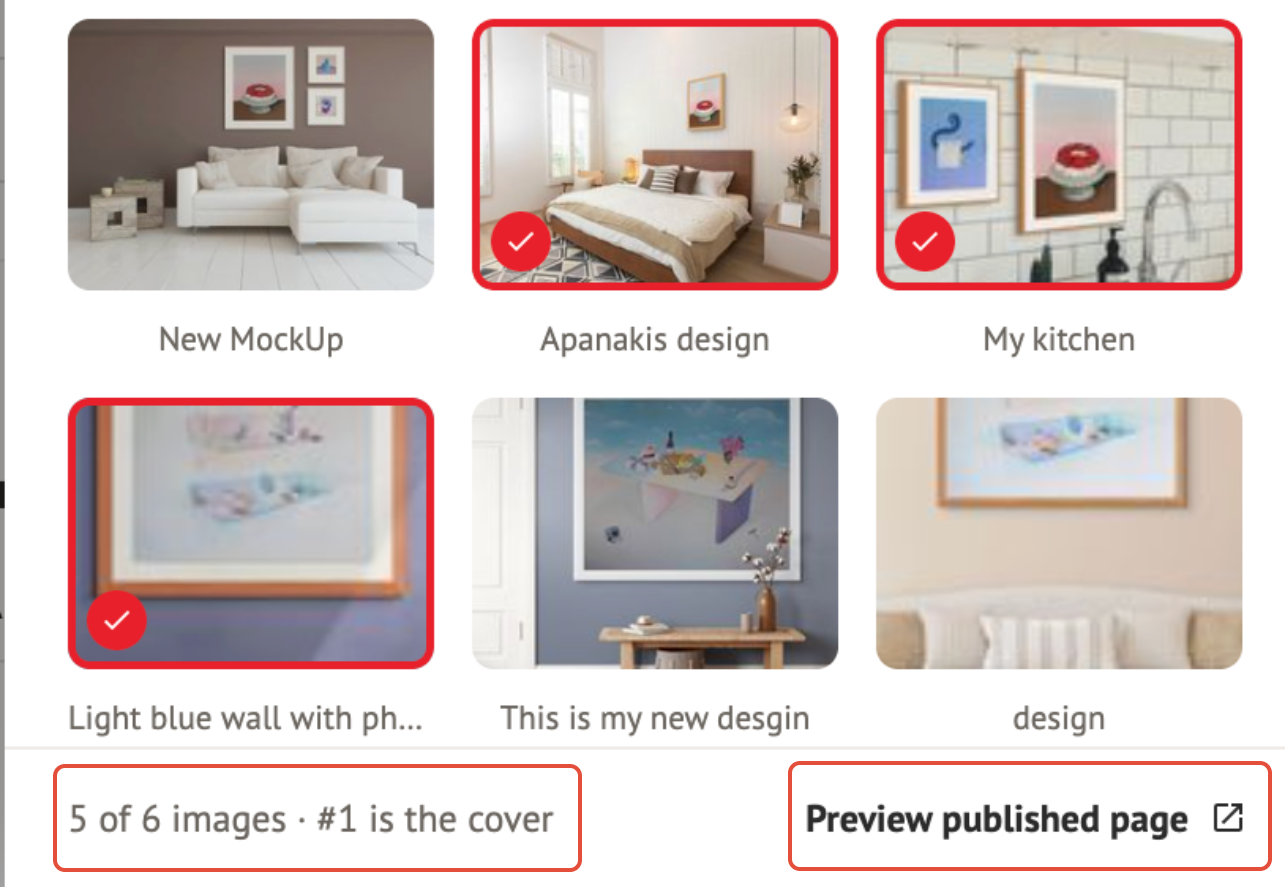
- Save your changes and go back: Click "Close" at the top left. You'll return to your list of artworks, where this Artwork will now show how many images it has, for example "3 images in carousel".
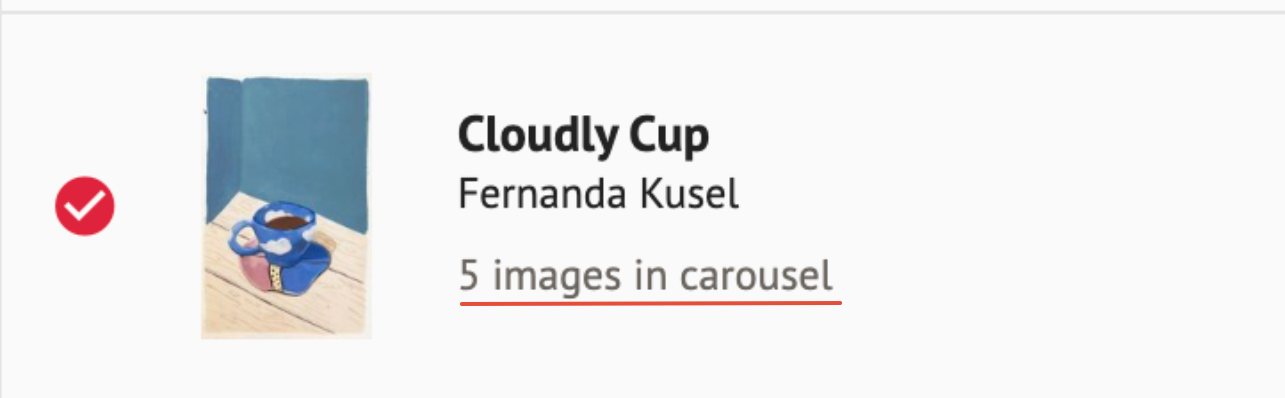
- Repeat for your other artworks: Select the next artwork and follow steps 1 to 7. When you're done, click "SAVE AND CONTINUE " to move on to Step 3.
3. Final Touches
- Additional info: Add additional details like Artist Name, Statement, and Contact Info.
- Preferences:
Add a Data Capture Form to protect your microsite and collect client information.
Pick your Font Family and decide if you'd like to display your Discover Profile and the ArtPlacer Footer.
Once all steps are complete, you can either PREVIEW IN NEW TAB, SAVE AS DRAFT, or GO LIVE to start sharing with your audience!
Troubleshooting
If you cannot see an artwork on the list, please check the Privacy Settings tab in the Additional Information tab. If the artwork is set to “PRIVATE,” it will not be displayed.